Open LettrLabs Help & Tutorials how to set up Severe Storm Automation.
Learn how to send direct mail to homeowners impacted by Hail Storms and Severe weather, powered by HailTrace maps & LettrLabs Direct Mail
What is Severe Storm Automation and how can I used it to get more hail damage roofing leads?
Severe Storm Automation allows you to target homeowners impacted by severe weather with highly personalized direct mail with our exclusive partnership with HailTrace.
- Automatically target homeowners impacted by severe weather like hail storms, wind, tornados, or hurricanes.
- When speed to lead is important, we mail your cards out within 1-3 business days after a storm, ensuring you beat your competition to the punch.
- We leverage the best weather data provided by HailTrace to ensure you're targeting the right neighborhoods at the right time.
https://www.loom.com/embed/7f01219bc8bd440dac42e692621e5aa3?sid=a2c19521-1dd0-4f13-b27c-38e7340336c9
How to Use LettrLabs Hail Storm Automation powered by HailTrace
How to set up Storm Automation:
Step 1: Click Storm Automation on the left side of the LettrLabs page.
Click the orange “New Automation” button in the upper right-hand corner. On this page you can also see any previous Storm Automation orders you have set up in the past.
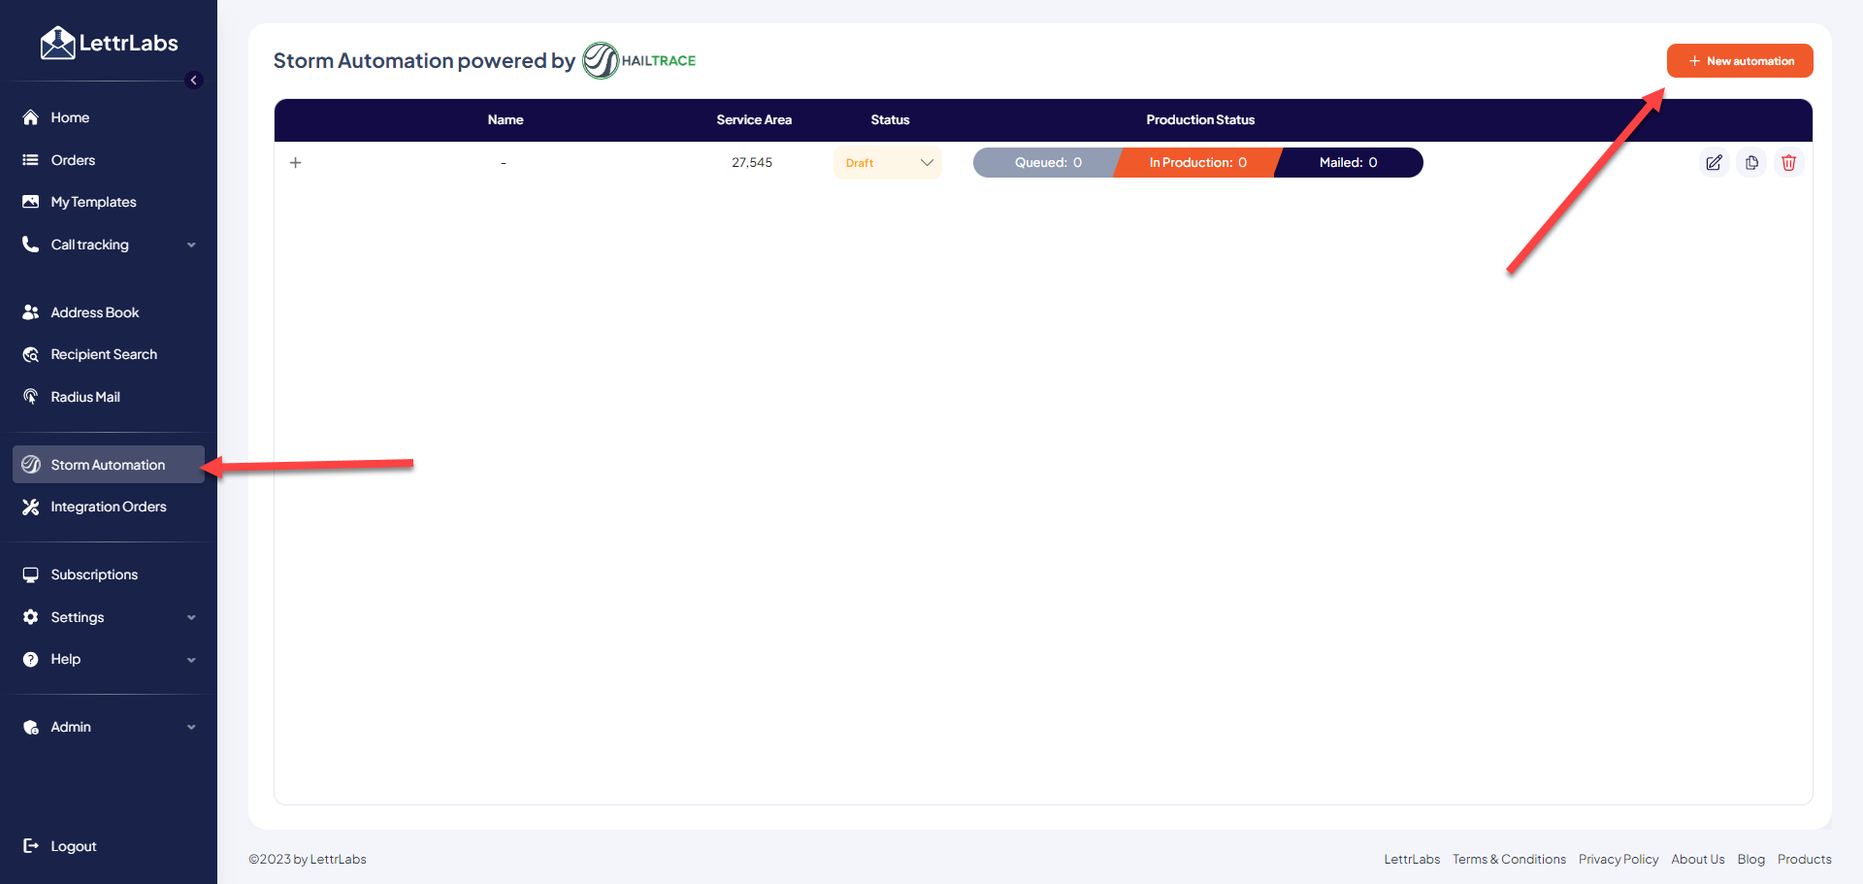
Once on the Storm Automation page there are instructions to follow to set up your Storm Automation order.
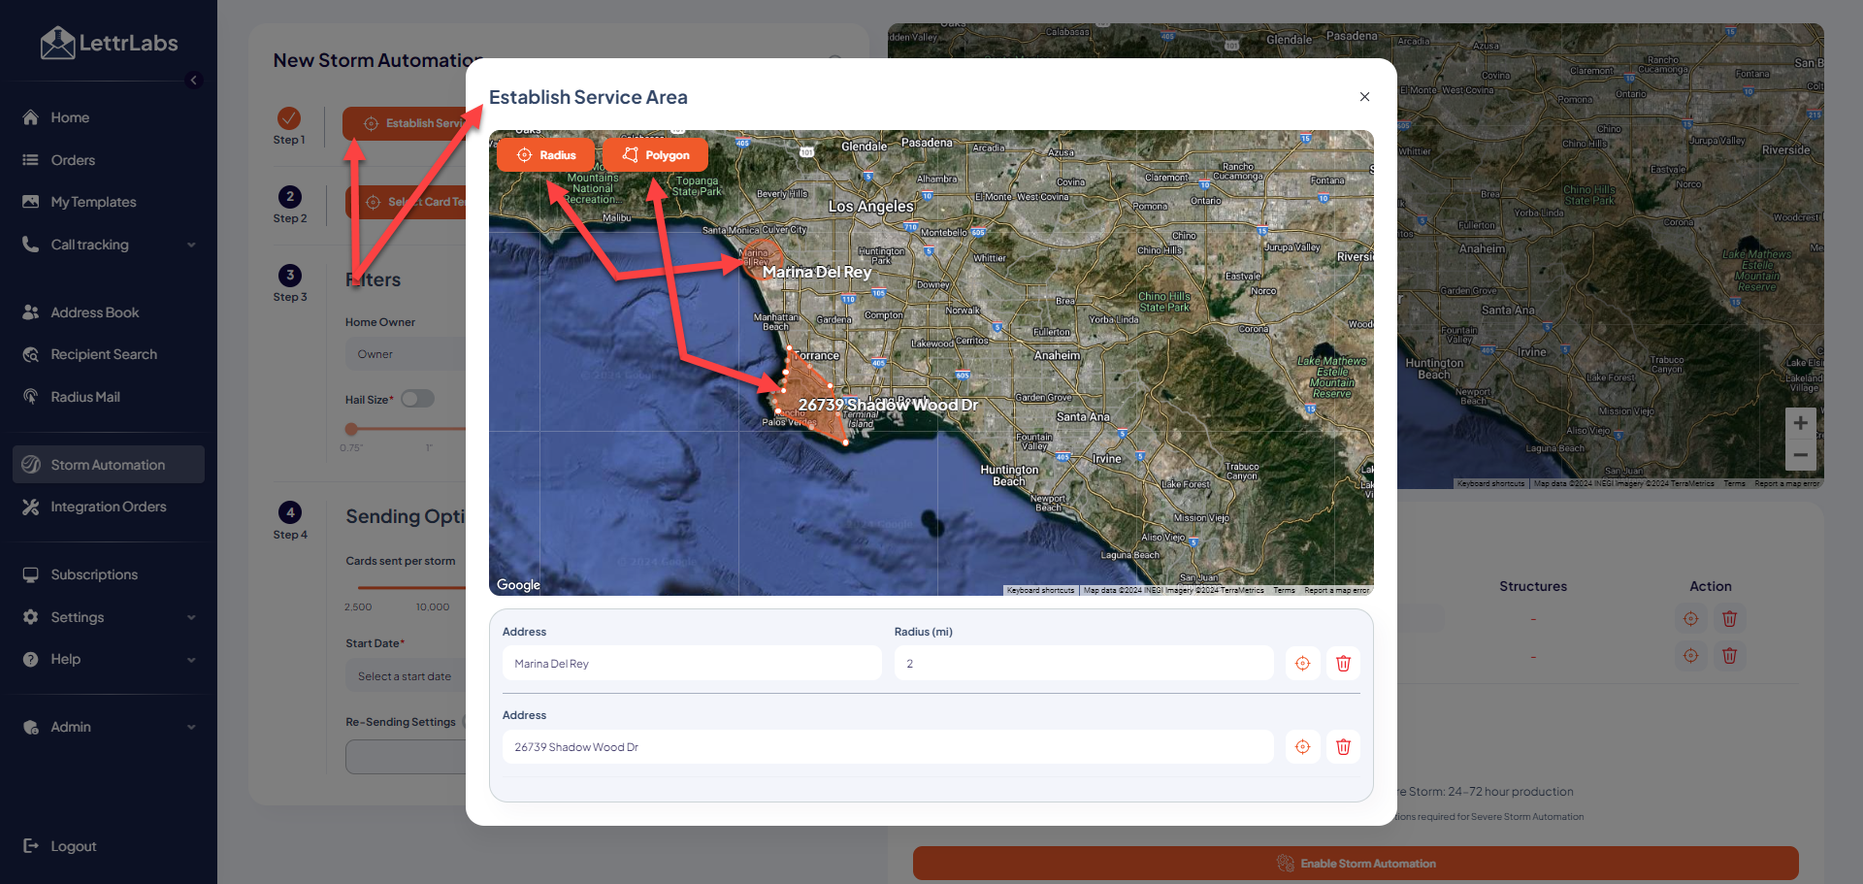
Step 2: Establish Service Area
You can add a radius or a polygon to establish your service area. If you add a Radius, you can increase or decrease the size of the radius. If you add a polygon you can use the dots to increase the polygon size to cover the entire city. If you decide to add more than one radius or polygon and they overlap, don’t worry. We will make sure there aren’t any duplicate recipients on your list. Make sure your service area is large so it can encompass a whole severe storm.
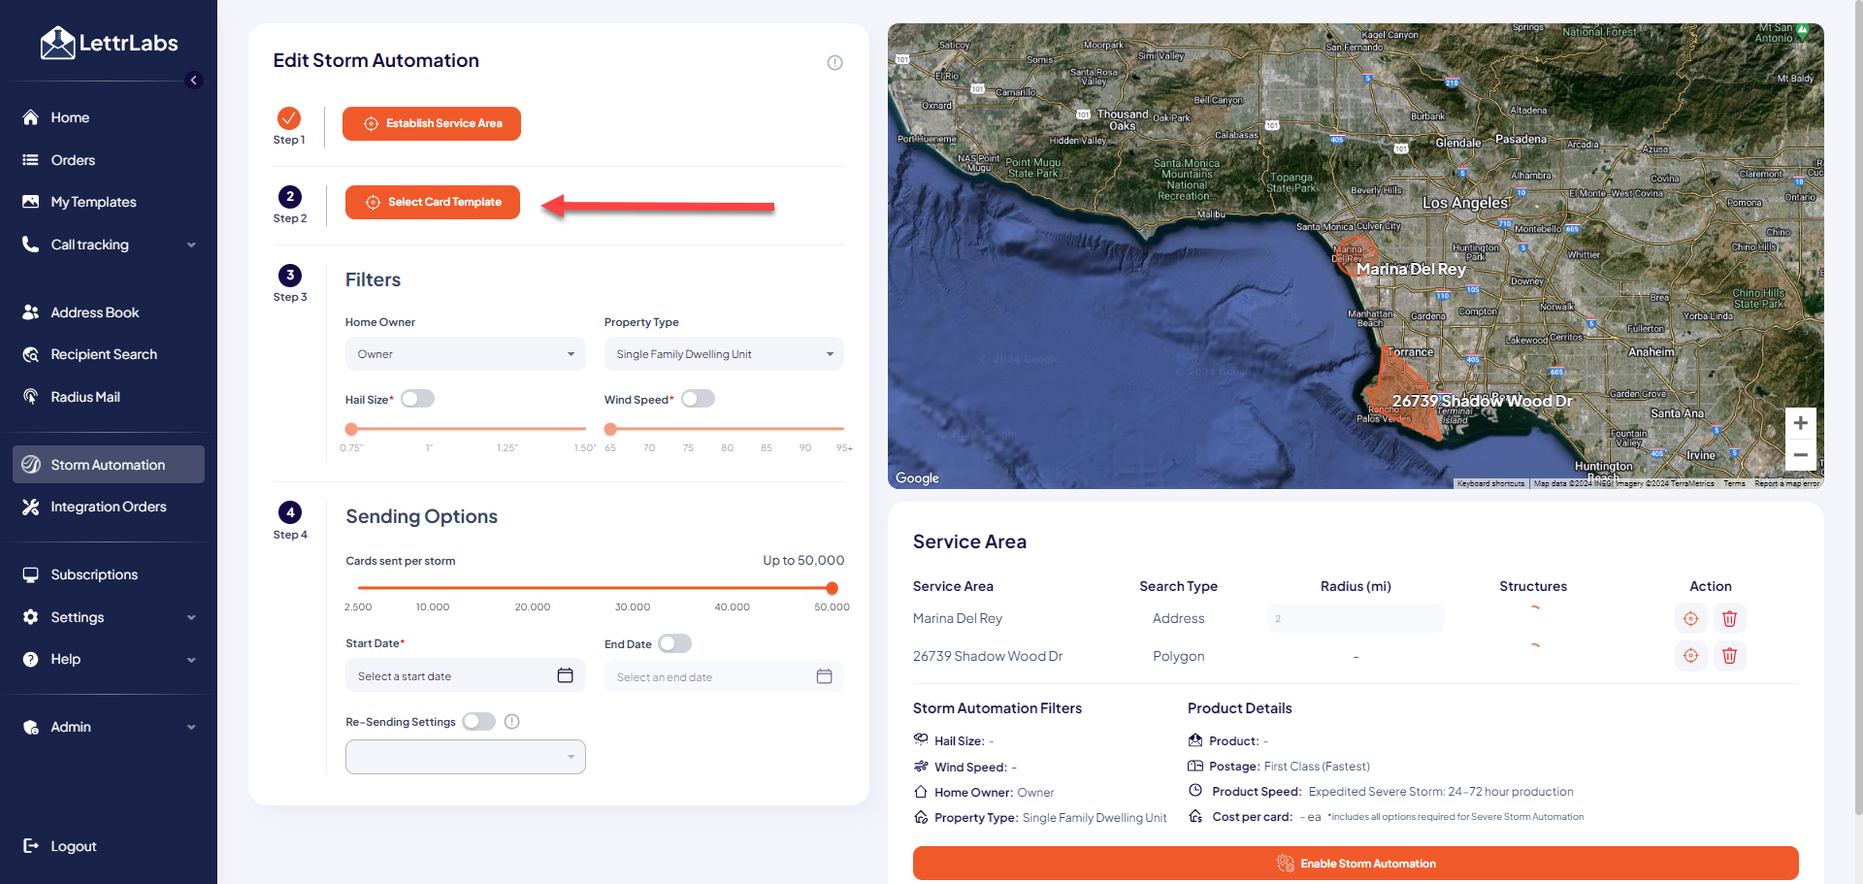
Step 3: Select your card template
This would be a pre-made template you have created specifically for your Storm Automation orders. See “how to use templates for more information on creating and using templates.
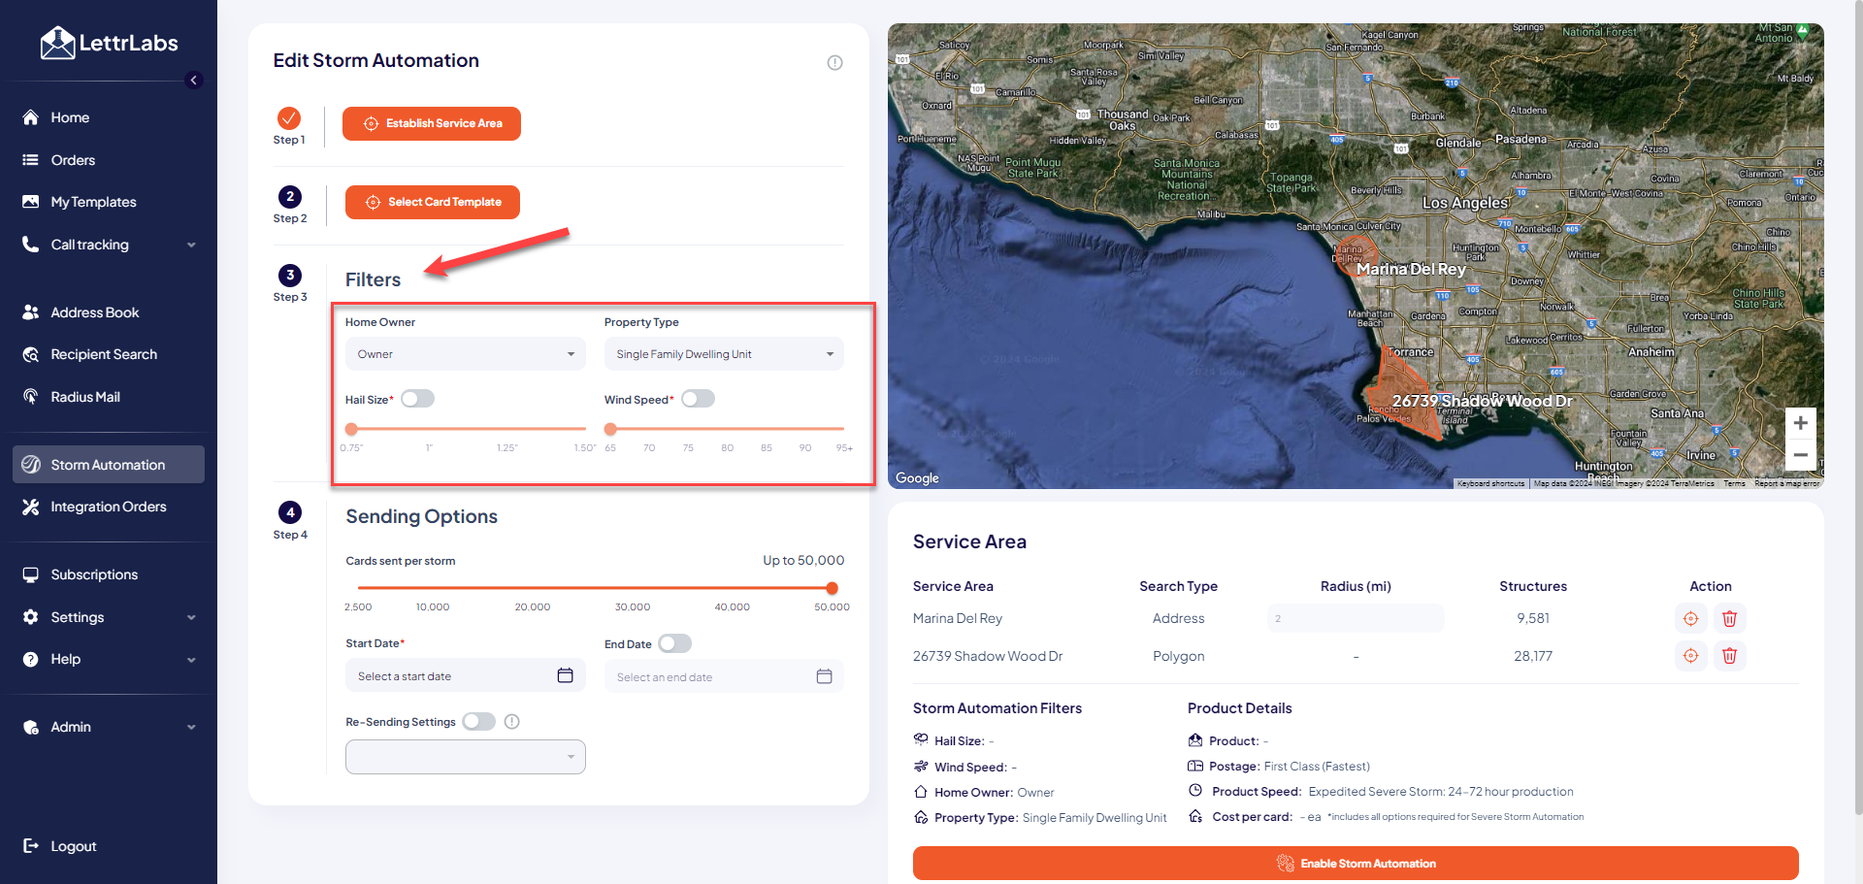
Step 4: Filters
Use the filters to create your target audience. You can choose from the following filters:
Home Owner –You can select Owners, Renters or All (if you select All it will include both owners & renters).
Property Type – You can select All, Single Family Dwellings or Multi Family Dwellings (if you select All it will include both single & multifamily).
Hail Size & Wind Speed – You can choose if you want to set up your Severe Storm Automation for either Hail Size or Wind Speed, but not both.
Step 5: Sending Options
Cards sent per storm - 2,500 is the minimum number of cards you can send. We encourage you to send more than that and you can send up to 50,000 per storm. We will send cards based on the Storm and send them to the most damaged neighborhoods in your Service Area first.
Start Date & End Date – Choose the date that you want your Sever Storm Automation to begin. It can be as soon as today. You don’t need to choose an end date but if you do simply click the “End Date” button and choose when you would like to turn off your Severe Storm Automation.
Re-sending Settings – This is here to keep duplicates going to recipients within a certain timeframe. For instance, if you have 3 storms in your service area within a 3 week period and you have your Re-Sending Setting set to 4 weeks, we will only send your recipients a card for the first storm and not the 2 others within the 3 week period.
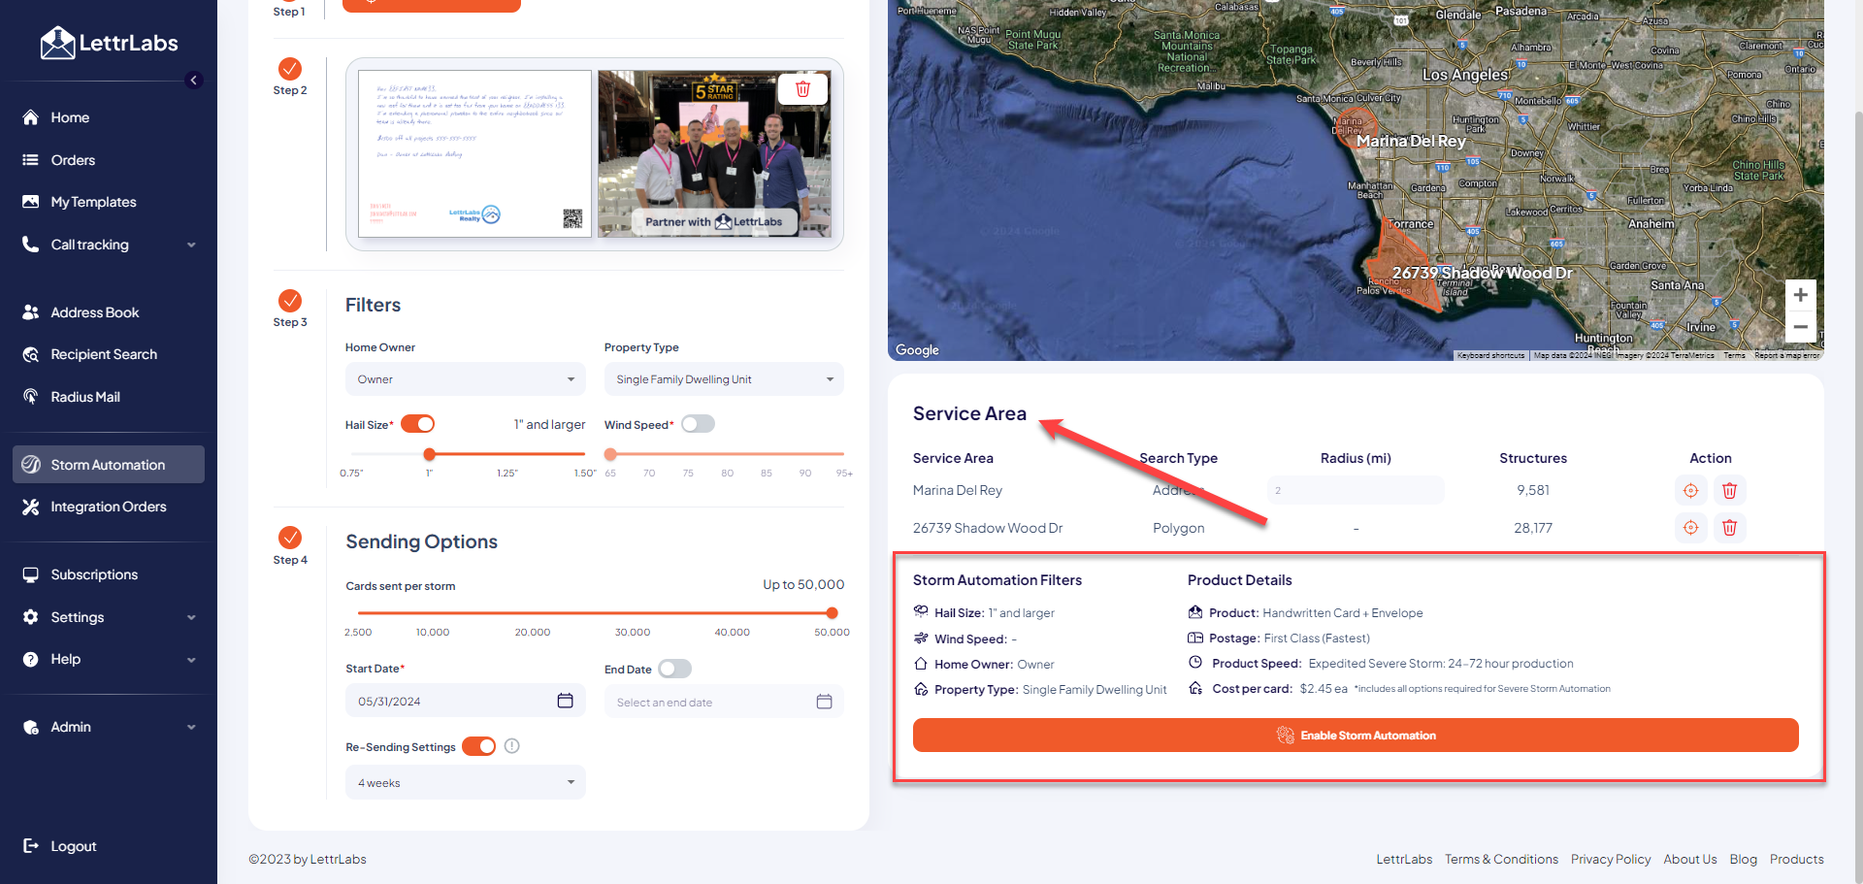
Service Area – This is where you will see the list of Pin addresses you added in Step 2. You can change the number of recipients for each pin address here too. (The minimum number of recipients per pin address is 100 and there is no maximum).
How to Enable & Service Area Storm Automation Service Areas
This is where you can review your Storm Automation before it goes live. You can review your Service Area(s) that you set up above, you can double check your product and see the price per card. This price per card includes first class postage, and expedited production. If everything looks good to you, you can hit the orange “Enable Storm Automation” button at the bottom of the screen. This will take you to your last screen where you can give your Storm Automation order a name, double check the quantity of cards being sent and see the pricing. Once you enable your Severe Storm Automation, we will do the rest.
- Once your Storm Automation order is submitted you will get an email confirmation that it is production and then you will get a second email once the order is complete and all of the pieces have been mailed.
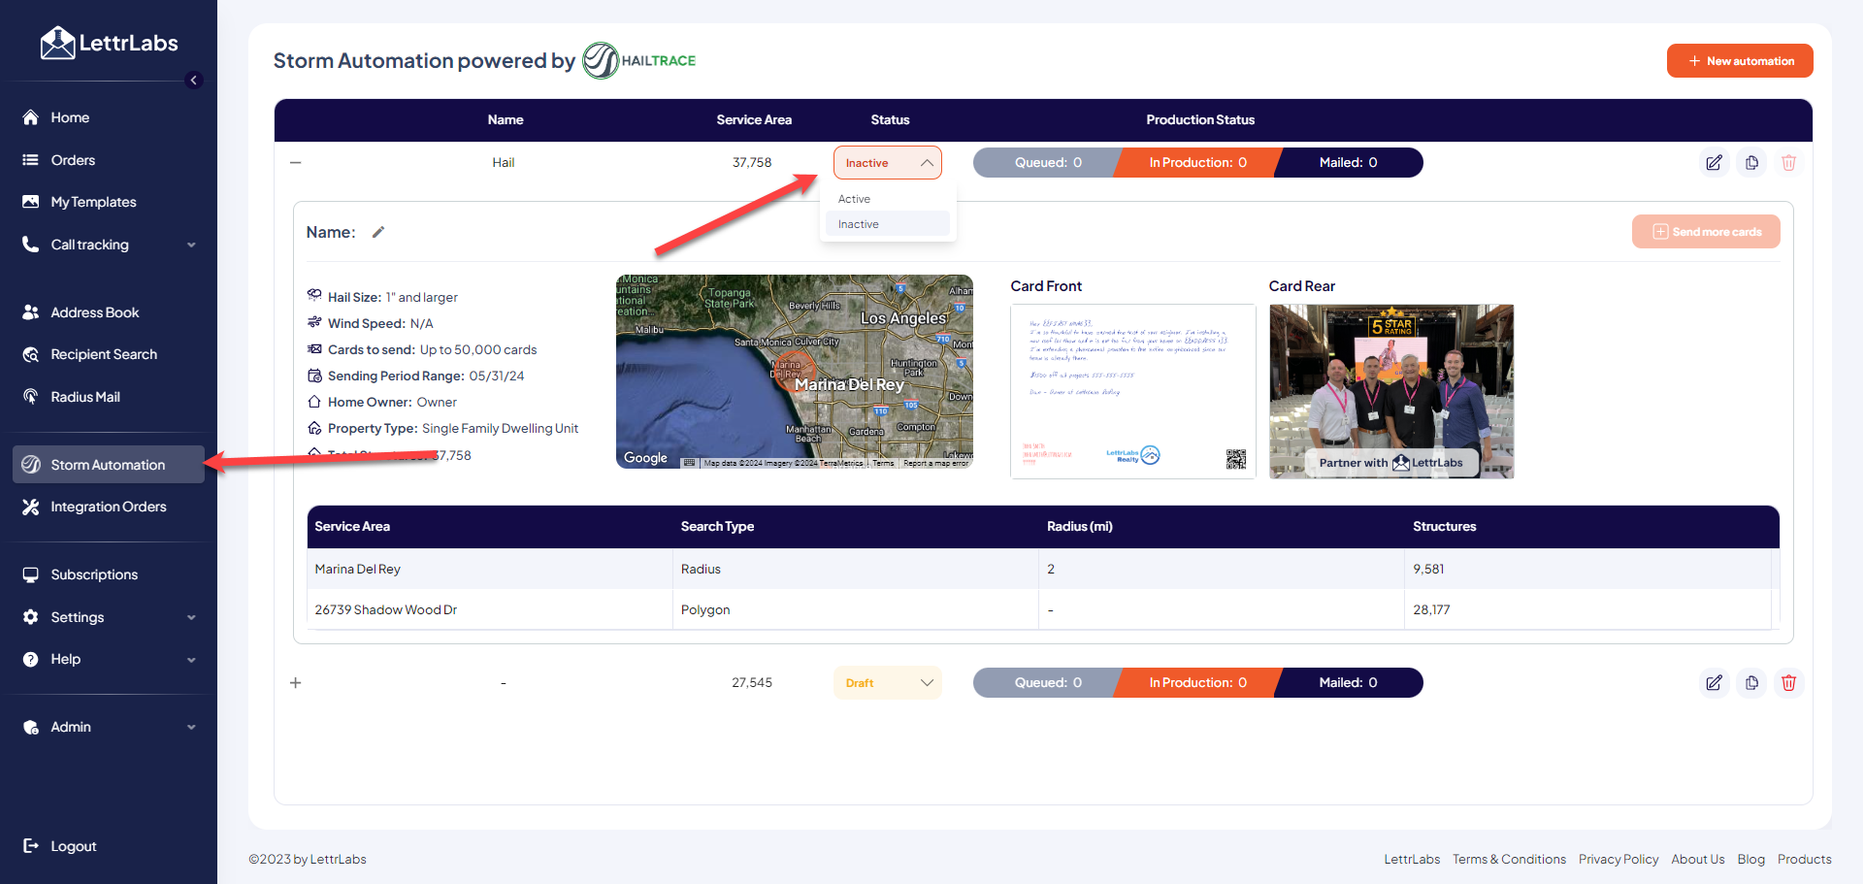
- You can view your Storm Automation after it’s been enabled by going to the “Storm Automation” tab. You can also check the status of your Storm Automation and if you need to change the status from Active to inactive, this is where you would do it..
