In this article we're going to show you how to add custom images and artwork to your cards to make them stand out!
Where can I add images and artwork?
First, before we get started let's review where you can you add custom artwork.

- Card Front: Compliment your handwritten message with company logos or other small graphics
- Card Back: Use our “Double-Sided” printing option to add full-bleed custom graphics
- Envelope: To keep your card looking at authentic as possible we do not do any custom printing on envelopes
How to upload artwork to the Front
- Click the purple circle within the placeholder for the logo at the top of the card
- Locate your desired logo or graphic from you computer through the “Upload” button. We support both Jpeg & PNG file formats, we suggest a minimum resolution of 300dpi
- Add additional graphics. Make sure your logo is first unselected then click the “add image” button, then repeat step 2. **Place additional graphics with breathing room around written text, not overlap graphics with written text**
If you need to make a change to artwork already uploaded, select the graphic with your cursor and re-upload or delete it entirely.
How to upload artwork to the back
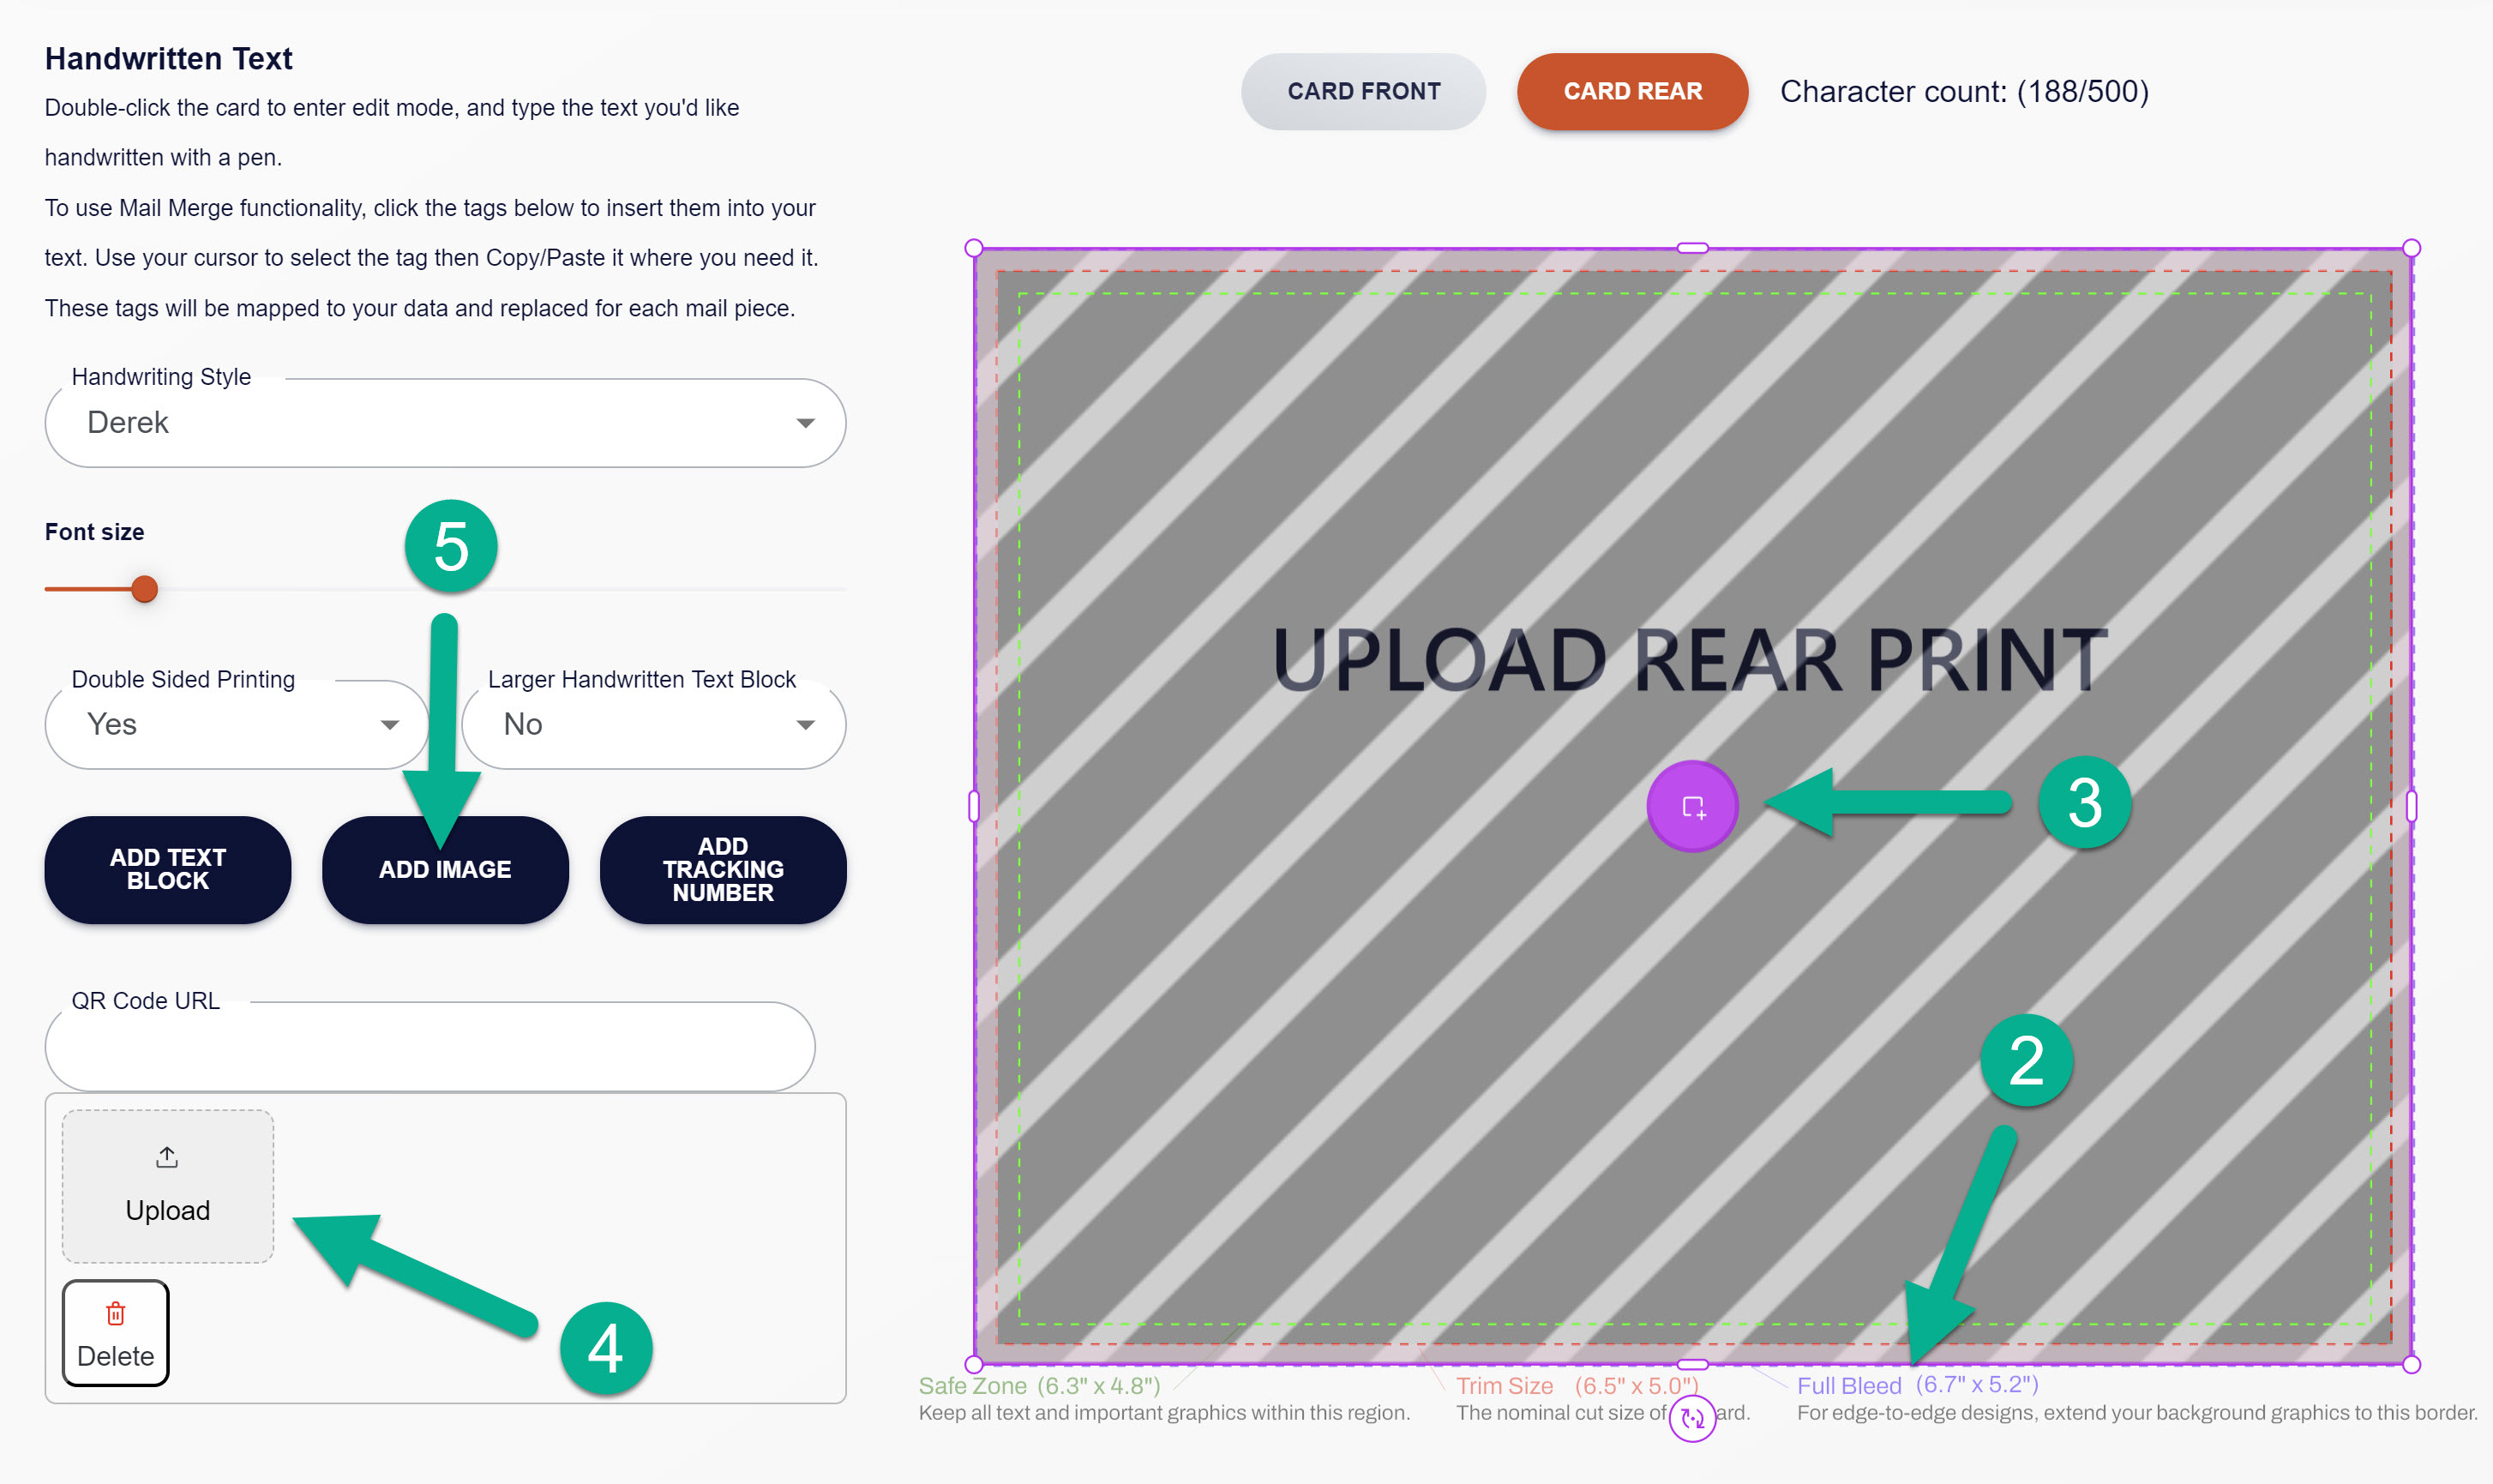
- First make sure you have the double-sided printing feature marked as “Yes”. Once this is complete click the “Card Rear” button above the card rendering to reveal the backside.

- We recommend you create your artwork with dimensions to match the Full-Bleed dimensions shown under the card visual of teh product you’re ordering.
- Click the purple circle within the placeholder for the artwork
- Locate your desired graphic from you computer through the “Upload” button. We support both Jpeg & PNG file formats, we suggest a minimum resolution of 300dpi
- Add additional graphics. Make sure your main image is first unselected then click the “add image” button, then repeat step 4.

If you need to make a change to artwork already uploaded, select the graphic with your cursor and re-upload or delete it entirely.


